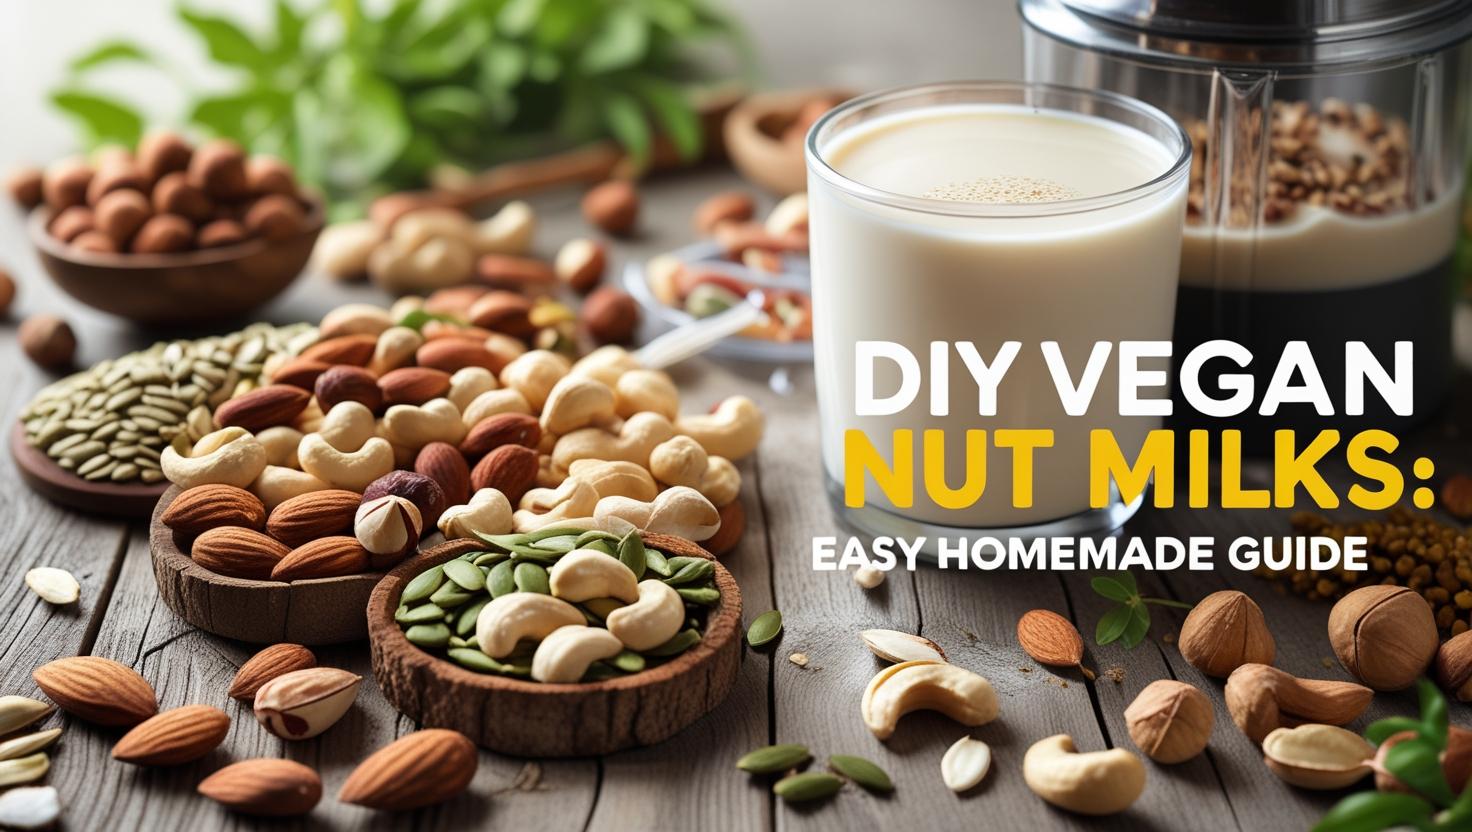
Plant-based milks have surged in popularity as delicious and versatile alternatives to dairy. While commercial options abound, making DIY vegan nut milks at home offers a unique set of advantages: unparalleled freshness, complete control over ingredients (no additives, gums, or unwanted sugars!), potential cost savings, and significantly reduced packaging waste. It connects us more closely to our food and revives simple, traditional kitchen skills. This guide provides a comprehensive exploration of how to easily make your own nut milks, viewed through the lenses of nutrition, ethics, environment, and practical, step-by-step techniques adaptable for any kitchen, including those here in Jaipur using locally available nuts.
Your Guide to Homemade Plant‑Based Nut Milks
LENS 1: Nutritional Analysis (Pure & Simple Nutrition)

Homemade nut milks offer purity but differ significantly in nutritional profile compared to commercial options and dairy milk.
- Ingredient Control & Purity: The primary nutritional benefit is knowing exactly what’s in your milk: just nuts, water, and any optional natural flavourings or sweeteners (like dates/khajoor or jaggery/gur) you choose to add. This means avoiding thickeners, emulsifiers, preservatives, and potentially high amounts of added sugar often found in commercial varieties.
- Nutrient Profile Variability: The nutritional content (calories, fat, protein, micronutrients) depends entirely on the type of nut used and, crucially, the nut-to-water ratio. Higher nut concentration yields richer, higher-calorie, higher-fat, and slightly higher-protein milk.
- Almonds (Badam): Good source of Vitamin E and magnesium. Relatively lower in calories/protein compared to soy milk or dairy unless made very concentrated.
- Cashews (Kaju): Provide creaminess, magnesium, zinc. Blend very smooth.
- Walnuts (Akhrot): Unique source of plant-based Omega-3 ALA. Stronger flavour.
- Peanuts (Moongphali): Very affordable in India, good source of protein and biotin. Distinct flavour.
- The Fortification Factor (CRUCIAL DIFFERENCE): Commercial plant milks are often heavily fortified with Calcium, Vitamin D, and sometimes Vitamin B12 to mimic the levels found in dairy milk. Homemade nut milks LACK this fortification. This is a critical point – if relying on homemade nut milk, you must ensure you obtain these vital nutrients (especially Calcium, Vit D, and B12 for vegans) from other dietary sources or supplements.
- Soaking Benefits: Soaking nuts before blending (a key step in the process) may help reduce phytic acid content. Phytic acid can bind to minerals like iron, zinc, and calcium, potentially hindering their absorption. Soaking might make these minerals slightly more bioavailable and also improve digestibility for some people.
- Lower Protein: Generally, homemade nut milks (at standard ratios like 1:4 nuts:water) are much lower in protein than dairy milk or soy milk. Cashew and peanut milk might be slightly higher than almond milk. If you rely on plant milk for calcium, how would switching to homemade nut milk change your strategy for meeting your calcium needs?
Nutritional Deep Dive: Fortification Factor – Bridging the Nutrient Gap
Dairy milk is a significant source of Calcium and often Vitamin D in many diets. Commercial plant milks are fortified to provide comparable levels, making them an easy swap nutritionally for these specific nutrients. Homemade nut milk, while pure, provides only the nutrients inherent in the nuts themselves, which are generally not high sources of Calcium or Vitamin D (and contain no B12). Therefore, users of primarily homemade nut milk must be diligent about getting:
- Calcium: From leafy greens (spinach/palak, mustard greens/sarson), fortified tofu, sesame seeds (til), almonds, fortified foods, or supplements.
- Vitamin D: From sunlight exposure (challenging to get enough, especially with skin protection), fortified foods, or supplements (often recommended).
- Vitamin B12: From fortified foods or supplements (essential for all vegans).
Voice of Experience (Registered Dietitian): “Homemade nut milks offer wonderful control over ingredients, avoiding additives and excess sugar. Nutritionally, their biggest drawback is the lack of fortification found in most commercial plant milks. If making your own, enjoy the freshness and purity, but be absolutely sure you have reliable sources of calcium, Vitamin D, and B12 elsewhere in your diet or via supplements.” – Dr. Meena Agarwal, RDN
LENS 2: Ethical Framework (Conscious Consumption)

Choosing to make DIY vegan nut milks aligns with several ethical considerations beyond simply avoiding dairy.
- Avoiding Dairy Industry: Directly bypasses the ethical concerns associated with commercial dairy farming, including animal welfare issues, separation of calves, and environmental impact.
- Ingredient Provenance: Homemade allows greater potential control over sourcing nuts. You can choose to buy Fair Trade certified nuts (especially relevant for cashews, which have documented labour concerns in some regions), organic nuts, or prioritize nuts grown more locally or sustainably (like peanuts in the Indian context).
- Reducing Packaging Waste: This is a major ethical and environmental win. Making nut milk at home eliminates the need for Tetra Paks or plastic bottles used for commercial milks. Tetra Paks, in particular, are difficult to recycle in many places, including parts of India. Reusable glass jars/bottles are used instead.
- Valuing Whole Foods & Skills: Reclaims a basic food preparation skill, fostering appreciation for whole ingredients and reducing reliance on industrially processed products. It connects you more closely to the food you consume.
- Minimizing Food Waste (Using Pulp): A key ethical aspect is utilizing the leftover nut pulp, rather than discarding it. This respects the resources used to grow the nuts and minimizes organic waste. What ethical aspect – avoiding dairy, reducing packaging, using pulp, sourcing nuts – motivates you most to consider making nut milk at home?
Hidden Benefits: Self-Sufficiency & Connection
The simple act of transforming nuts and water into milk fosters a satisfying sense of self-sufficiency. There’s also a deeper connection formed with basic food ingredients when you prepare them from scratch.
Voice of Experience (Zero-Waste Advocate): “Making my own almond or peanut milk is a core part of my low-waste kitchen. It completely eliminates carton waste, and I get creative using the leftover pulp in everything from roti dough to energy bites. It feels resourceful, ethical, and tastes so much fresher.” – @SustainableJaipurLiving (hypothetical social handle)
Critical Reassessment: The Nut Conundrum
While avoiding dairy’s ethical issues, be mindful of the ethics associated with certain nuts. Almonds and cashews have high water footprints, and cashew processing can involve harsh working conditions in some areas. Choosing more sustainable nuts (like peanuts locally) or ensuring ethical certifications for imported nuts adds another layer to conscious consumption. Also, acknowledge the time/effort involved.
LENS 3: Ingredient Science & Environment (Blending & Footprints)
Understanding the simple science behind nut milk and its environmental context helps optimize the process and choices.
- The Science of Extraction:
- Soaking: Hydrates the nuts, softening them for easier blending and potentially reducing phytic acid. May also activate enzymes (though effect on final milk is debated).
- Blending: High-speed blending physically breaks down the nut’s cell walls, releasing oils, proteins, starches, and flavour compounds into the water. This creates an emulsion (fat droplets suspended in water) and suspension (tiny solid particles suspended).
- Straining: Separates the insoluble fiber (pulp) from the liquid milk, resulting in a smoother texture. The fineness of the straining cloth (nut milk bag, muslin/cheesecloth) determines the final smoothness.
- Environmental Impact:
- Dairy vs. Plant Milks: All plant milks generally have significantly lower environmental footprints (GHG emissions, land use, water use) than dairy milk.
- Nut Water Footprints: Among nuts commonly used for milk, almonds and cashews are notoriously water-intensive to grow. Peanuts generally require less water. Choosing locally adapted nuts reduces water stress related to specific crops.
- Packaging Reduction: Eliminating Tetra Pak cartons or plastic bottles is a major environmental benefit of DIY. Tetra Paks are composite materials often not easily recyclable.
- Transport: Making milk at home from dried nuts avoids shipping heavy liquid products long distances.
- Using the Pulp: Prevents nutrient-rich pulp from ending up in landfills where it would decompose and potentially release methane, a potent greenhouse gas. Composting or consuming the pulp closes the loop.
- Blender Energy: A high-speed blender uses electricity, but only for a short duration (1-2 minutes per batch). Considering the high water footprint of almonds, would you prioritize using a different nut like peanuts or cashews (if sourced well) for your homemade milk?
Market Transformation Map Suggestion: Data showing the rising sales of reusable nut milk bags and high-speed blenders alongside the growth of the overall plant-based milk market.
Voice of Experience (Environmental Food Analyst): “While all plant milks beat dairy environmentally, homemade versions offer further gains by eliminating packaging waste and transport emissions for the finished liquid. The key remaining factor is the footprint of the nut itself – almonds and cashews are high water users, making choices like oats (different process) or potentially peanuts more sustainable in water-scarce regions like Rajasthan.” – Dr. R. Choudhary, Water Resource Management
LENS 4: Everyday Practitioner’s Experience (How-To, Tips & Recipes)
Making DIY vegan nut milk is surprisingly simple! Here’s the basic process and tips, focusing on nuts available in India.
Basic Homemade Nut Milk Recipe & Method:
- Yields: Approx 1 liter
- Ingredients:
- 1 cup Raw Nuts (Almonds/Badam, Cashews/Kaju, Walnuts/Akhrot, Peanuts/Moongphali – unsalted, unroasted)
- 3-4 cups Filtered Water (less for creamier milk, more for lighter)
- Optional: Pinch of Salt
- Optional: Sweetener to taste (1-2 Dates/Khajoor, small piece of Jaggery/Gur, 1 tsp Maple Syrup)
- Optional: Flavorings (1/2 tsp Vanilla Extract, 1/4 tsp Cardamom/Elaichi powder, few strands Saffron/Kesar soaked in warm water)
- Equipment:
- Blender (high-speed recommended for smoothest results)
- Nut Milk Bag, OR Fine Mesh Sieve lined with Muslin Cloth (malmal ka kapda) or clean Cheesecloth/thin Cotton Cloth
- Large Bowl
- Airtight Bottle/Jar for storage
Steps:
- SOAK: Place raw nuts in a bowl and cover generously with water. Soak for the recommended time (see below). This softens them for blending and may improve digestibility.
- Almonds: 8-12 hours or overnight. Blanching (briefly boiling, then slipping off skins) is optional for whiter milk and smoother texture.
- Cashews: 2-4 hours (quicker soak). Often don’t need straining if using a high-speed blender.
- Walnuts: 4-8 hours.
- Peanuts: 8-12 hours or overnight.
- RINSE: Drain the soaking water (discard it) and rinse the nuts thoroughly under fresh water.
- BLEND: Place rinsed nuts in the blender jar. Add 3-4 cups of fresh filtered water (start with less for creamier milk). Add optional salt, sweetener, or flavourings if using. Blend on high speed for 1-2 minutes, until completely pulverized and milky. It might get slightly warm.
- STRAIN: Place the nut milk bag or lined sieve over a large bowl. Pour the blended mixture into the bag/sieve.
- If using a bag: Gather the top and gently squeeze the milk out, twisting the bag, until only fairly dry pulp remains inside. This requires some hand strength!
- If using a sieve/cloth: Let it drip, then gently press the pulp with a spoon or gather the cloth edges and squeeze carefully.
- STORE: Pour the strained milk into a clean, airtight glass bottle or jar. Store in the refrigerator.
- SHAKE: Homemade nut milk will naturally separate (cream rises). Shake well before each use. Consume within 3-5 days (smell/taste test – crucial in warm climates like Jaipur).
Tips for Success:
- Blender Power: A high-speed blender makes a huge difference in how finely the nuts are ground, yielding creamier milk and less pulp. Standard blenders work but may require longer blending and result in more pulp.
- Straining Method: Nut milk bags are efficient. Fine muslin cloth (common in Indian kitchens) works well too. Multiple layers might be needed for ultra-smooth milk.
- Creaminess: Use less water (e.g., 1:3 ratio). Cashews naturally yield very creamy milk, often not needing straining in a good blender.
- Hygiene: Use very clean jars, cloths, and hands, especially in warm weather, to maximize shelf life.
Using the Nut Pulp (Zero Waste!):
Don’t throw it away! Nut pulp is packed with fiber and some nutrients.
- Add to atta dough for making roti/paratha.
- Mix into batter for cookies, muffins, cakes, or pancakes.
- Blend into smoothies for extra fiber.
- Use as a binder in homemade veggie burgers or koftas.
- Mix with dates/spices to make energy bites (ladoos).
- Dehydrate (oven/sun) and grind into nut flour (use in baking).
What local Indian flavour (cardamom, saffron, rosewater) would you add to your homemade nut milk?
Daily Impact: Cost & Freshness
While nut prices vary in India, making milk at home (especially with peanuts or if buying almonds/cashews in bulk) can often be cheaper per liter than buying commercial cartons, especially premium brands. The unparalleled freshness is a significant bonus.
Voice of Experience (Indian Home Cook): “I started making badam milk at home because the store ones felt too thin or had additives. Soaking overnight, blending with water, dates for sweetness, and a little elaichi powder, then straining through malmal cloth – it’s simple! The fresh taste is amazing, and I use the leftover badam pulp in my roti dough.” – Mrs. Geeta Soni, Jaipur
Alternative Approaches: Seed & Oat Milks
- Seed Milks: Similar process (soak, blend, strain) can be used for pumpkin seeds, sunflower seeds, or sesame seeds (til – makes lovely tahini-like milk). Great nut-free options.
- Oat Milk: Different process! Do NOT soak oats for long. Blend rolled oats briefly (30-60 seconds max) with water, then strain. Over-blending or soaking makes it slimy. Much cheaper than nut milks.
PERSPECTIVE INTERSECTION MATRIX
- Nutrition & Control (Lens 1 & 4): Making milk at home (Lens 4) allows precise control over ingredients, avoiding additives and tailoring nut:water ratios (Lens 1), but requires awareness of lacking fortification (Lens 1).
- Ethics & Waste Reduction (Lens 2 & 4): The ethical drive to reduce packaging and food waste (Lens 2) is directly fulfilled by the DIY process and using the leftover pulp (Lens 4). Sourcing choices (Lens 2) impact ingredient selection (Lens 4).
- Environment & Nut Choice (Lens 3 & 4): Understanding the water footprint of different nuts (Lens 3) can guide practitioners (Lens 4) towards choosing more sustainable options like peanuts or locally adapted nuts. Reducing packaging (Lens 3) is inherent in the practice (Lens 4).
- Science & Technique (Lens 3 & 4): Understanding soaking and blending science (Lens 3) helps achieve smoother milk and informs practical techniques like straining or choosing not to strain cashews (Lens 4).
- Cost & Accessibility (Lens 4 & 1/2/3): Practical cost savings (Lens 4) make nutritious (Lens 1), ethical (Lens 2), and relatively sustainable (Lens 3) plant milk more accessible.
MISCONCEPTION ANALYSIS
| Misconception | Reality |
| Making vegan nut milk at home is complicated and very time-consuming. | The basic process (soak, rinse, blend, strain) is simple. Active time is minimal (5-10 minutes for blending/straining). Soaking happens passively overnight or for a few hours. |
| You need expensive, imported nuts like macadamias for good nut milk. | Excellent, creamy nut milks can be made from widely available and affordable nuts like almonds (badam), cashews (kaju), or especially peanuts (moongphali) in India. Taste varies, but all work well. |
| Homemade nut milk tastes bland, watery, or gritty compared to store-bought. | Wateriness depends on the nut:water ratio – use less water for richer milk. Blandness is solved by adding optional salt, sweetener (dates, jaggery), or flavours (vanilla, cardamom). Grittiness is minimized by proper soaking, high-speed blending, and effective straining. |
| Homemade isn’t as healthy because it lacks added Calcium & Vitamin D. | It’s true it lacks fortification (a major difference!). It’s healthier in terms of lacking additives/gums/excess sugar. Users must ensure they get Calcium, Vit D, and B12 from other reliable sources in their diet or supplements. |
| You need a $500 high-speed blender to make decent nut milk. | While high-speed blenders (Vitamix, Blendtec) yield the smoothest results and less pulp (especially with cashews), a good standard blender works fine. You might need to blend slightly longer and strain more carefully. |
KEY TURNING POINTS
- Rise of Veganism & Dairy Alternatives: Increased demand drove interest beyond commercial options.
- Health Concerns over Additives: Consumers seeking purer options without gums, thickeners, oils, or excess sugar found in some brands.
- Zero Waste & DIY Movements: Emphasis on reducing packaging and embracing homemade staples spurred interest in DIY milks.
- Accessibility of Blenders: More affordable and powerful blenders becoming available for home use.
- Online Tutorials & Communities: Websites, blogs, and videos made the process seem easy and accessible, sharing tips and pulp recipes.
- Awareness of Environmental Footprints: Discussions around the water use for almonds, in particular, led some to seek alternatives or make their own more consciously.
SYNTHESIS & RECOMMENDATIONS
Making your own DIY vegan nut milks is a simple, empowering, and rewarding kitchen skill. It puts you in complete control of ingredients, yields incredibly fresh-tasting milk, significantly reduces packaging waste, and can often be more economical than buying commercial brands. While it crucially lacks the fortification (Calcium, Vit D, B12) of store-bought options – requiring mindful attention to getting these nutrients elsewhere – the benefits of purity, freshness, and sustainability are compelling. Using readily available nuts in India like almonds, cashews, or peanuts, and embracing the zero-waste potential by using the leftover pulp, makes homemade nut milk a fantastic addition to a conscious, plant-based lifestyle.
Recommendations for DIY Nut Milk Success:
- Soak Your Nuts: Follow recommended soaking times for softer nuts and potentially better digestion/nutrient absorption. Always rinse well after soaking.
- Use Filtered Water: For the best taste, use filtered water for blending (ratio typically 1 part nuts : 3-4 parts water).
- Blend Thoroughly: Use the highest speed on your blender for 1-2 minutes for the creamiest result.
- Strain Effectively: Invest in a nut milk bag or use multiple layers of fine muslin cloth (malmal) for smooth, pulp-free milk. Squeeze well!
- Flavor to Taste: Add a pinch of salt to enhance flavour. Experiment with natural sweeteners (dates, jaggery) and spices (cardamom, vanilla) if desired.
- Store Safely: Keep refrigerated in a clean, airtight glass bottle. Shake before use. Consume within 3-5 days, being extra mindful of freshness in warm climates like Jaipur.
- Use the Pulp! Don’t waste the nutritious pulp – add it to roti, baked goods, smoothies, or make energy bites.
- Mind the Nutrition Gap: Remember homemade milk isn’t fortified. Ensure adequate Calcium, Vitamin D, and essential B12 from other sources or supplements.
FURTHER AREAS OF EXPLORATION
- Creative Recipes Using Leftover Nut Pulp (Sweet & Savory)
- A Comparative Guide: Making Milk from Almonds vs. Cashews vs. Peanuts vs. Walnuts
- How to Make Creamy Homemade Oat Milk (Without the Slime!)
- Exploring Seed Milks: Sesame (Til), Pumpkin (Kaddu), Sunflower
- Can You Fortify Homemade Plant Milks? Methods & Considerations
- Troubleshooting Common DIY Nut Milk Problems (Too Thin, Separates Quickly, Short Shelf Life)
